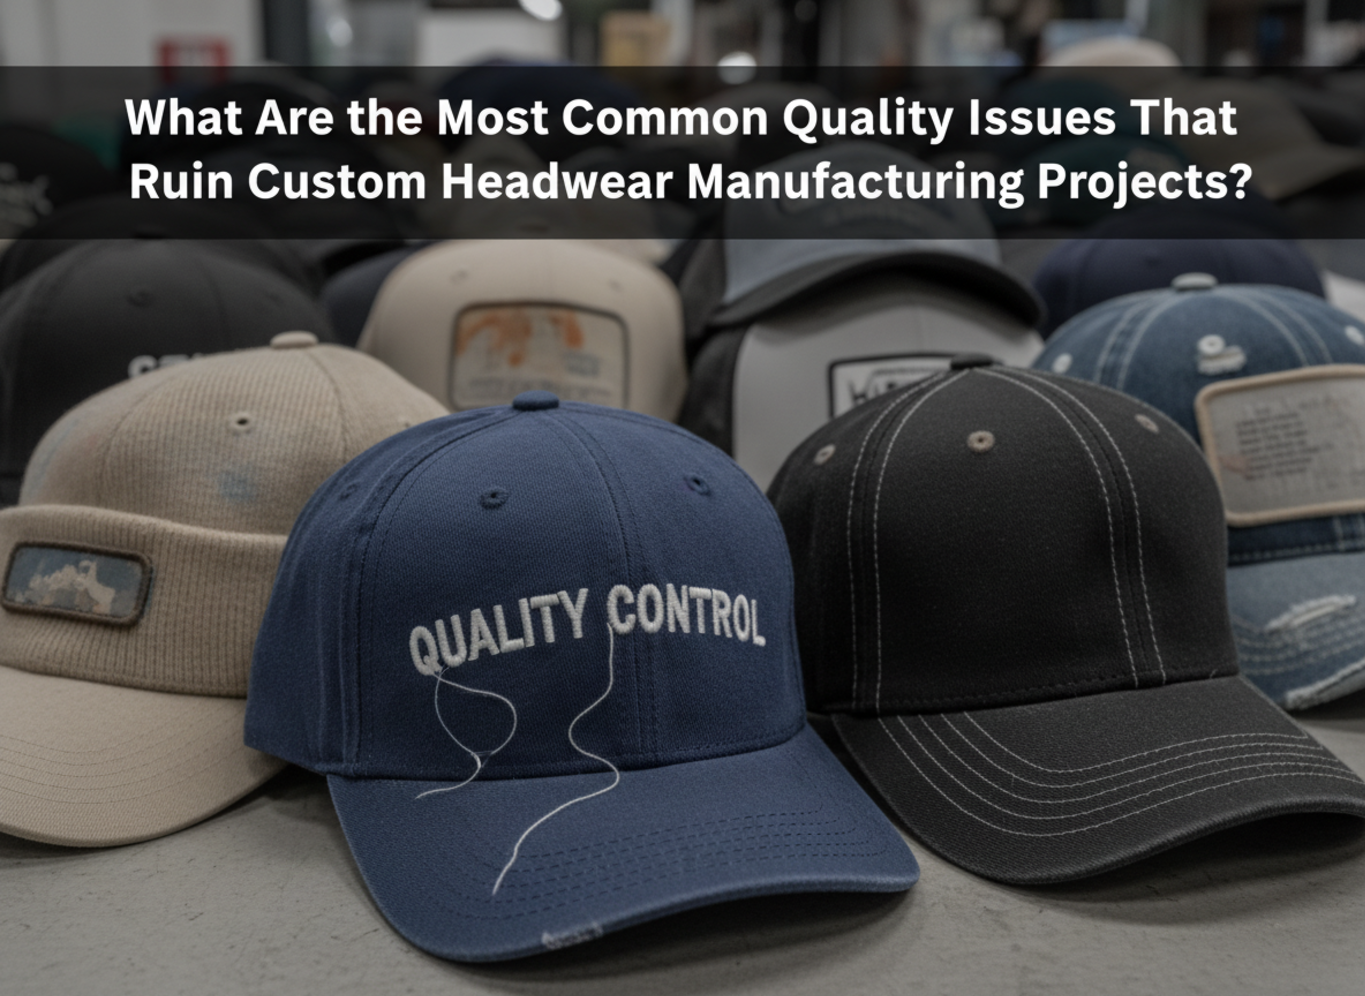
You spend months designing the perfect cap, but the final delivery looks terrible. Bad stitching and wrong colors can destroy your brand’s reputation instantly. You need to know why this happens.
The most common quality issues in custom headwear include poor embroidery alignment1, inconsistent sizing2, significant color mismatches between batches3, and using cheap fabrics that lose shape4. These problems usually stem from unclear tech packs5, lack of pre-production samples6, or working with factories that cut corners on quality control7.

I have seen many creators lose money because they trusted the wrong manufacturer. I want to help you avoid these expensive mistakes. Let’s look at exactly what goes wrong so you can fix it before it starts.
What are common problems with custom hat orders?
Ordering custom hats feels risky when you cannot see the factory. You worry about receiving boxes of unsellable products. This fear is real for every new brand owner.
Common problems include crooked logos8, wrong material choices, shipping damage due to poor packaging9, and missed deadlines. Often, the factory does not understand the design file, or they rush the sewing process, leading to loose threads10 and uneven brims11.

When you start a clothing brand, you expect the factory to be perfect. But I have learned that without clear instructions, many things go wrong. The biggest issue is usually communication. You might say "thick fabric," but the factory uses a heavy canvas that feels rough instead of a premium wool blend. This happens because "thick" is an opinion, not a specification.
Another major problem is the construction of the crown. If the internal fusing12—the stiff material inside the front panels—is cheap, the hat will collapse after one week of wear. I see this often with low-cost suppliers. Also, packaging is a silent killer. If a factory stuffs 50 hats into a small box to save on shipping, the brims arrive bent and the crowns are crushed. You cannot iron a structured hat back to life easily.
Here is a breakdown of general issues and why they happen:
| Issue Category | Specific Problem | The Root Cause |
|---|---|---|
| Structure | Crown collapses or looks wrinkly. | Poor quality buckram13 or fusing material inside the front panels. |
| Finishing | Loose threads inside the sweatband. | Workers rushing the final trimming stage to save time. |
| Packaging | Bent brims and crushed shapes. | Using thin cardboard boxes or packing too many units per box. |
| Materials | Fabric fades quickly in the sun. | Using cheap stock fabric with poor color fastness ratings. |
You must treat your manufacturer as a partner, not just a machine. You need to specify everything from the packaging method to the specific fabric weight.
Why do custom caps sometimes look different from samples?
You approved a perfect sample, but the bulk order looks completely different. Nothing is more frustrating than this "bait and switch" experience. It feels like a betrayal.
Custom caps differ from samples because factories might use "stock market" fabric for samples but a different batch for bulk. Also, different workers might sew the bulk order, or the factory might rush the mass production speed, lowering the attention to detail compared to the single sample run.

This is a painful lesson for many of my clients before they work with Anthea. The sample is usually made in a special "sample room." The workers there are the masters. They have the most experience and take their time to make one perfect hat. They want to impress you so you place the order. But when you order 300 pieces, the job moves to the main production line. These workers are paid for speed. They might not be as careful as the sample master.
Another reason is the fabric sourcing. For a sample, the factory might buy a few meters of high-quality fabric from a local market. But for the bulk order, they might order a fresh roll from a textile mill. This new roll could be slightly different in texture or shade. This is called a "lot variance14." If the factory does not check this against your approved sample, you get a surprise.
You need to understand the difference between the sample stage and the production stage:
Differences in Production Stages
- The Worker Skill Level
- Sample: Made by a "Master Sewer15" with 10+ years of experience.
- Bulk: Made by line workers who specialize in just one operation (like attaching the brim).
- The Machine Settings
- Sample: Machines are calibrated specifically for your one item.
- Bulk: Machines run fast and might vibrate, causing slight shifts if not monitored.
- The Time Taken
- Sample: 2-3 hours spent on one hat to ensure perfection.
- Bulk: 15-20 minutes per hat to meet deadlines.
To fix this, you must demand a "Pre-Production Sample" (PPS) made with the actual bulk fabric and by the production line, not the sample room.
How do you avoid embroidery mistakes on hats?
A crooked logo makes your brand look cheap and unprofessional immediately. You cannot sell a hat if the main design is messy or illegible. It ruins the whole product.
To avoid embroidery mistakes, you must digitize your logo file correctly for curved surfaces. Ensure the factory uses high-quality thread and proper backing paper. Always request a "sew-out" photo on the actual fabric before they start the full production run to check for density and clarity.

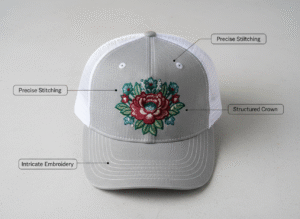
Embroidery is not like printing on paper. It involves pushing a needle through thick fabric thousands of times. The most common mistake I see is using a design file that is too complex. If your letters are smaller than 5mm in height, they will look like a blob of thread. The needle and thread physically cannot make sharp corners at that size. You have to simplify your logo for hats.
Another huge issue is the "center seam" on 6-panel caps. There is a thick seam running right down the middle of the front. If you place a detailed part of your logo right over this bump, the embroidery will distort. The needle hits the thick seam and jumps slightly. We often suggest using 5-panel hats for complex logos to avoid this seam, or using a 3D puff embroidery that sits on top of the seam better.
Here are the technical things you need to check:
Embroidery Checklist
- Digitizing File (DST)16: Is the file made for a flat shirt or a curved hat? It must be programmed to sew from the center out to prevent the fabric from puckering.
- Thread Tension17: If the tension is too loose, you see loops. If it is too tight, the fabric pulls and wrinkles around the logo.
- Backing Paper: The factory must use strong backing paper inside the hat. If they use thin paper, the logo will warp after one wash.
- 3D Puff Foam18: If you use 3D embroidery, check the edges. The foam should not poke out through the thread. The stitch density must be high enough to cover the foam completely.
What causes sizing inconsistencies in bulk hat production?
Customers complain that one hat fits perfectly, but another is too tight. Inconsistent sizing destroys customer trust and leads to expensive returns. You need consistency to build loyalty.
Sizing inconsistencies happen because cutting fabric is often done in tall stacks. If the blade shifts, the bottom layers get cut larger or smaller. Additionally, since hats are hand-sewn, human error varies the seam allowance. A difference of just 2mm in sewing changes the final circumference significantly.

Many people think hats are made by robots. They are not. Every single hat is stitched by a human being at a sewing machine. This means human error is always possible. The main cause of size difference starts in the cutting room. Factories stack 50 to 100 layers of fabric and cut them all at once with a large vertical blade. If the blade leans even a tiny bit, the bottom layer will be a different size than the top layer.
Then comes the sewing. The standard seam allowance might be 1cm. If a worker sews at 1.2cm, the hat becomes tighter. If they sew at 0.8cm, the hat becomes loose. When you have six panels in a hat, a tiny error on each panel adds up. A 1mm error on six panels equals a 6mm difference in the total size. That is almost a full size difference for the person wearing it.
You need to know the acceptable tolerance standards to hold your factory accountable:
| Measurement Point | Standard Tolerance (+/-) | Why it Matters |
|---|---|---|
| Circumference | 1.0 cm | This determines if the hat fits the head or falls off. |
| Crown Height | 0.5 cm | Too high looks like a stovepipe; too low feels shallow. |
| Brim Length | 0.3 cm | An uneven brim looks visibly crooked to the naked eye. |
| Front Panel Width | 0.5 cm | Affects how the logo sits on the front. |
At Anthea, we use molds and steam to shape the hats at the end, which helps correct some small variances, but strict cutting controls are the only real solution.
How do you prevent color mismatch in custom headwear?
You wanted navy blue, but the hats arrived looking purple. Color mistakes are obvious and make your brand look uncoordinated. It is a nightmare for your brand identity.
Prevent color mismatch by using Pantone (PMS) codes19 instead of computer screen colors. Fabric dye lots vary, so ask for a "lab dip" approval if you are dyeing custom fabric. For stock fabric, ask the factory to mail you a physical swatch card to verify the color under natural light.

The screen on your phone or laptop uses light to create color (RGB). Real products use ink or dye (CMYK or Pantone). These two worlds do not match perfectly. A bright neon blue on your screen might look dull on cotton fabric. This is just physics. You cannot trust a digital mockup for exact color matching. You must use the Pantone Matching System (PMS). This is the universal language for color.
However, even with a Pantone code, the material matters. If you dye polyester and cotton with the same red ink, they will look different. Polyester is shiny and reflects light, making the color look brighter. Cotton absorbs light, making the color look deeper or matte. You also need to check colors under different lights. This is called "Metamerism20." A hat might look perfect in sunlight but look brown under indoor fluorescent lights.
Here is how to ensure your colors are correct:
The Color Approval Process
- Do Not Trust Screens: Never say "match the color in this email attachment." It looks different on every monitor.
- Send Physical Samples: If you have a t-shirt you want to match, cut a piece off and mail it to the factory. This is the safest way.
- Request Swatch Cards: Before mass production, ask the factory to send you small squares of the actual fabric.
- Check in Sunlight: Take the sample outside. Factory lighting is often bad. Sunlight reveals the true shade.
- Understand Dye Lots: If you order 500 hats now and 500 hats next year, the color might shift slightly. Fabric rolls are dyed in batches. You should order enough for your whole season at once to keep the color consistent.
Conclusion
Manufacturing custom hats has risks, but you can control them. Focus on clear specs, Pantone codes, and strict sampling. At Anthea, we handle these details so you get perfect products every time.
-
Learn the root causes (hooping, digitizing, seam placement) and proven QC checks to keep logos straight. ↩
-
Helps you set measurable tolerances and verify cutting/sewing controls to reduce returns and complaints. ↩
-
Explains dye-lot variance and practical steps (lab dips, lot control) to keep repeat orders consistent. ↩
-
Compare fabric performance so you can choose materials that maintain crown/brim shape after wear and shipping. ↩
-
A strong tech pack reduces ambiguity and prevents wrong materials, sizing drift, and misplaced branding. ↩
-
Shows how PPS catches bulk-line issues before mass production so you avoid costly “sample vs bulk” surprises. ↩
-
Gives red flags and audit questions so you choose partners with reliable QC systems. ↩
-
Covers alignment methods, seam considerations, and approval steps that protect your brand presentation. ↩
-
Find packaging standards that reduce deformation and protect structured hats during freight. ↩
-
Learn finishing checkpoints and trimming standards that separate premium hats from rushed production. ↩
-
Explains shaping/assembly causes and the QC measurements that catch defects before shipping. ↩
-
Understand which fusing choices prevent collapse and how to specify them to suppliers. ↩
-
Helps you choose the right stiffener grade so structured caps keep their shape over time. ↩
-
Learn how to manage roll-to-roll differences with controls that prevent shade/texture surprises. ↩
-
Clarifies why samples look better and how to ensure bulk is made to the same workmanship standard. ↩
-
Proper DST setup prevents puckering and distortion, improving readability and stitch quality on caps. ↩
-
Shows how to avoid loops, pulling, and wrinkling so your logo embroidery stays clean and consistent. ↩
-
Get stitch-density and edge-finishing guidelines to achieve professional raised embroidery results. ↩
-
Using PMS reduces subjective color calls and improves consistency across materials, suppliers, and reorders. ↩
-
Avoid costly color surprises by learning how lighting changes perceived shade and how to validate matches. ↩