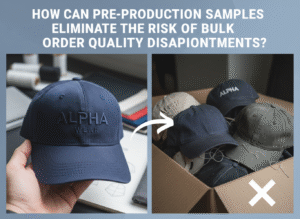
You work hard on your designs, but a small mistake can ruin an entire order. Do you worry about opening boxes to find the wrong colors or bad stitching?
Before approving a custom hat production run, ask about specific color codes1, embroidery dimensions2, material swatches3, and seam construction4. Confirming the pre-production sample matches your tech pack exactly5 is the most critical step to ensure your vision becomes reality without costly errors.

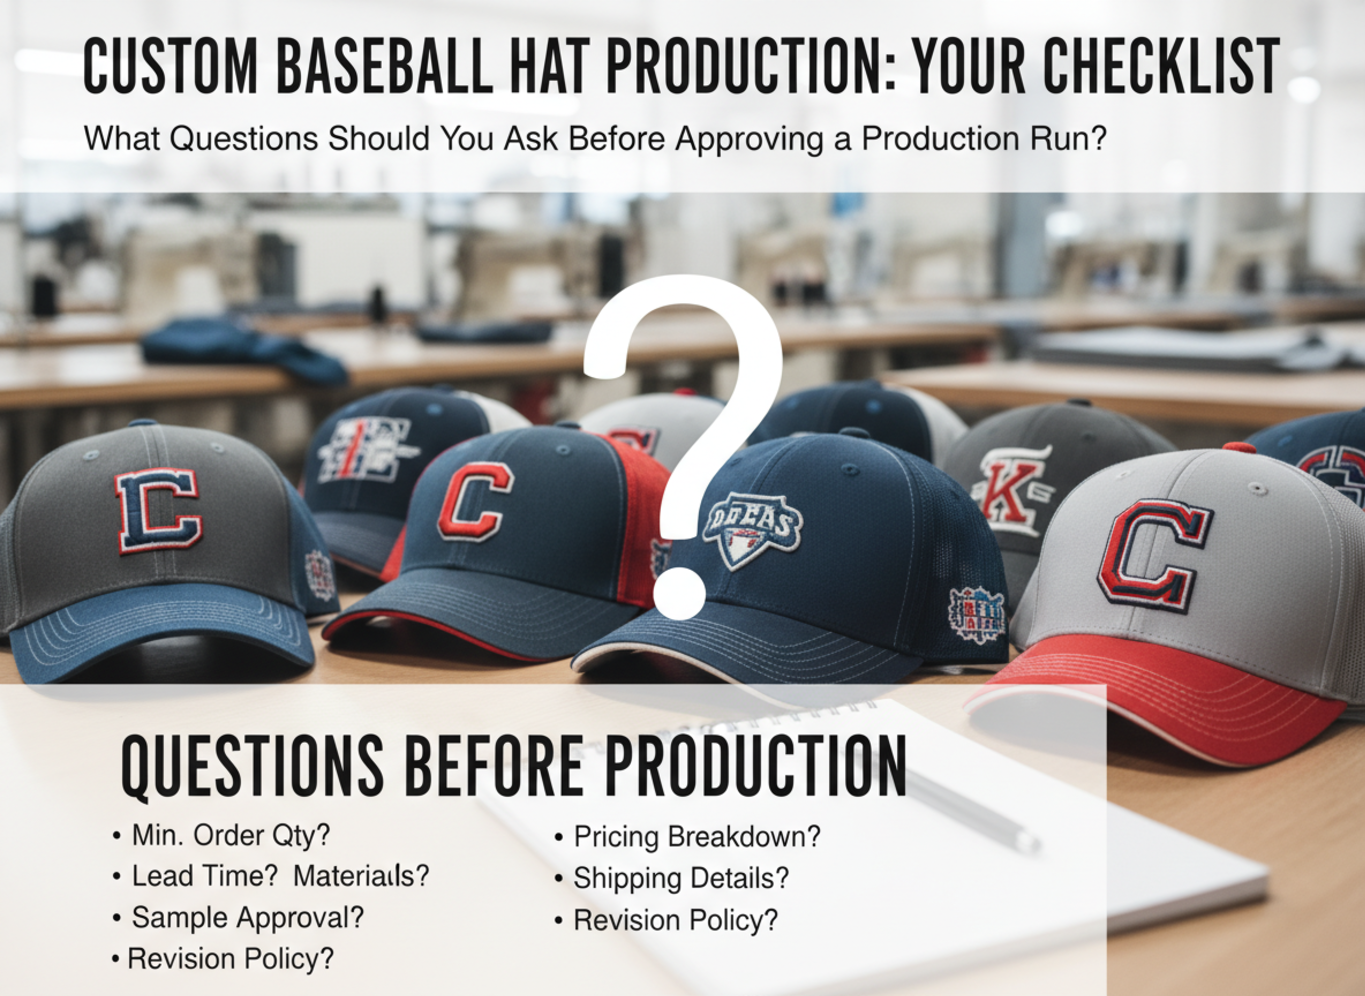
Many brands skip important checks because they rush to get products on their website. I have seen great designs fail because of simple communication gaps between the designer and the factory. Let me show you exactly what to ask so your hats arrive perfect every time.
What should be approved before mass production?
It is exciting to see a sample, but don’t say "yes" too fast. Missing a detail now means fixing 500 hats later, which costs you time and money.
You must approve the fabric quality, color accuracy (Pantone matching6), logo placement, and stitching tension7. Never start mass production until you have physically held and inspected the production sample approval8 unit.

When we talk about custom hat production approval9, many clients think looking at a photo is enough. It is not. You need to touch the hat. A photo cannot show you the texture of the cotton or the stiffness of the brim. I always tell my clients to ask for the "Golden Sample10." This is the one perfect hat that the factory will use as a standard for all others.
You need to break down your approval into specific categories. Do not just look at the whole hat; look at the parts. For example, check the sweatband inside. Is it comfortable? Check the closure on the back. Does it snap or slide smoothly? These small things change how your customers feel about your brand. If you find an issue, do not be afraid to ask for a second sample. It is cheaper to make another sample than to reprint 500 caps.
Key Elements to Inspect Physically
| Element | What to Check | Why it Matters |
|---|---|---|
| Fabric Weight | Feel the thickness | Thin fabric looks cheap and loses shape. |
| Color Match | Compare to Pantone book | Screens display colors differently than real life. |
| Logo Position | Measure with a ruler | Even a 5mm shift can make the logo look off-center. |
| Inside Taping11 | Check for loose threads | Clean interiors show high-quality manufacturing. |
What is included in a pre-production checklist?
Do you have a list or are you guessing? Relying on memory is dangerous when managing orders. You need a system to catch errors before they happen.
An effective hat manufacturing checklist12 includes verifying the Bill of Materials (BOM)13, measuring size tolerances14, checking label spelling, and testing closure functionality15. This list acts as your final safety net before the machines start running.

I use a strict apparel pre-production checklist16 for every order at Anthea, and you should too. This list is your safeguard. The first thing on your list must be the Bill of Materials (BOM)13. This lists every single item used to make your hat, from the main fabric to the button on top. If the checklist says "polyester" but you wanted "cotton," you catch it here.
Next, you must check the labels. I have seen brands print thousands of hats with a typo in their website address on the inner tag. That is a disaster. Your checklist should force you to read every word on every label. Also, check the packaging. How will the hats be packed? Will they be crushed? Adding packaging requirements to your checklist ensures your hats arrive in good shape.
The Essential Checklist Breakdown
- Bill of Materials (BOM)13: Confirm fabric type, buckle metal, and thread type.
- Sizing Specs: Measure the circumference and crown height against your chart.
- Artwork Details: Check spelling, font, and colors on all embroidery or prints.
- Compliance Labels: Ensure country of origin and material percentages are correct.
- Packing Method: Confirm box thickness and inner bag quality.
| Checklist Item | Common Mistake | How to Avoid |
|---|---|---|
| Inner Label | Wrong website spelling | Copy-paste text directly from your file, do not retype. |
| Top Button | Wrong color | Specify if it matches the crown or the visor. |
| Stitching | Contrast thread missing | State clearly if you want thread to match or contrast. |
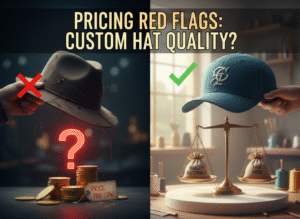
How do you prevent manufacturing mistakes?
Factories are busy places, and confusion happens. If your instructions are vague, the result will be random. You need to be extremely clear.
To prevent mistakes, use clear visual mockups17 and reference specific Pantone codes instead of general color names. Ask pre-production questions custom caps manufacturers need, like thread thickness and brim stiffness, to remove ambiguity.

The best way to prevent mistakes is to assume nothing. When you say "Navy Blue," I might think of a dark midnight blue, but another person might think of a brighter marine blue. This is why we use Pantone codes. It is a universal language for color. If you do not provide a specific code, you are guessing, and guessing leads to errors.
Another major issue is file formats. When you send your logo, always use vector files like AI or PDF18. If you send a JPEG, the edges get pixelated when we zoom in to digitize the embroidery. This makes the final logo look messy. To know what to confirm before hat production starts, you must look at your Tech Pack19. This document should be the "bible" for your product. If a detail is not in the Tech Pack19, do not expect it to be on the hat.
Communication Best Practices
- Use Visuals: Do not just write "make the logo smaller." Draw a circle on the photo and write "reduce width to 5cm."
- Ask for Confirmation: After you send instructions, ask the factory to repeat them back to you.
- One Channel: Keep all design changes in one email thread or platform. Do not switch between WhatsApp and Email for design changes.
| Vague Instruction | Clear Instruction |
|---|---|
| "Make the brim flat." | "Brim curvature: 0 degrees (Flat). 4 rows of stitching." |
| "Use a nice gold thread." | "Embroidery Thread: Metallic Gold, Pantone 871 C." |
| "Put my logo on the side." | "Logo Placement: Left panel, 2cm up from the bottom edge." |
What is the hat approval process?
The timeline can feel confusing. If you do not know the steps, you cannot manage your launch date. You need a map of the journey.
The hat approval process generally moves from digital mockup to sourcing materials, then to the pre-production sample, and finally to the bulk production deposit. Understanding these custom cap approval process steps keeps your project on schedule.

Let’s break down the custom cap approval process steps so you know exactly where you stand. At Anthea, we start with the Digital Mockup. This is a computer drawing. It is fast to change. We can change colors in five minutes. You should make all your big design changes here. Once you approve this, we move to Sourcing.
The next step is the Physical Sample. This takes about 7 to 10 days. We make one hat for you to check. This is the most important pause point. You look at the photos or the physical hat. If you need changes, we make a Revised Sample. Only after you say "Approved" do we order the fabric for 200 or 500 hats. Many new brands try to rush the sample stage, but this is where you save your business.
Typical Timeline for Approval
- Design Submission: You send us your logo and idea.
- Digital Proof (1-2 days): We send you a 2D mockup.
- Sample Production (7-10 days): We make the first real hat.
- Sample Review: You check photos or the hat in hand.
- Revisions (if needed): We fix errors (add 5-7 days).
- Final Approval: You sign off and pay the deposit.
- Mass Production (20-30 days): We make the bulk order.
| Stage | Action Required | Risk Level |
|---|---|---|
| Mockup | Check spelling and colors | Low (Easy to fix) |
| Sample | Check fit and material feel | Medium (Costs time to fix) |
| Production | Wait for delivery | High (Cannot fix without high cost) |
How do you confirm specifications with a factory?
You sent an email, but did they understand? Misunderstandings in language or terminology cause the biggest delays. You need a formal agreement.
You confirm specifications by asking the factory to create a formal sales order or invoice that lists every detail. Review this document to see if it matches your what to confirm before hat production starts notes.

The final step is the paperwork. It sounds boring, but the invoice is your contract. When I send an invoice to a client, I list every detail: "6-panel dad hat, washed cotton, unstructured, brass buckle." You need to read this line by line. If the invoice says "plastic snap" but you wanted "velcro," you must say something now.
This is also the time to ask your pre-production questions custom caps makers might have missed. Ask about the packaging marks. Ask about the shipping terms (Incoterms20). Are you paying for shipping to your door or just to the port? Confirming these specs prevents surprise fees later. I always suggest my clients sign the "Approved Sample" tag. We keep one tag, you keep one. If the final hats look different, we compare them to the tag.
Final Confirmation Steps
- The Invoice Match: Does the price match the quote? Does the description match the sample?
- The Golden Sample10 Tag: Tag the approved sample with the date and your signature.
- Shipping Address: Double-check your phone number and address. Drivers need this.
| Specification | What to verify |
|---|---|
| Quantity | Is the total number correct? |
| Size Breakdown | Are the counts per size (S/M/L) correct? |
| Material | Is the fabric composition (e.g., 100% Cotton) listed? |
| Lead Time | Is the estimated completion date written down? |
Conclusion
To get the perfect hats, you must ask the right questions, follow a strict checklist, and approve a physical sample before mass production starts.
-
Learn the standard ways factories interpret color codes so you avoid costly mismatched fabric and thread colors. ↩
-
Gives proven measurement methods so your embroidery comes back crisp, proportional, and placed correctly. ↩
-
Shows what to verify (hand feel, weight, weave) so the final hats match expectations, not just photos. ↩
-
Helps you understand seam options and spot weak construction before you commit to a full run. ↩
-
Provides a step-by-step comparison process to catch deviations before they become expensive bulk mistakes. ↩
-
Explains how to match fabric and thread reliably so color accuracy stays consistent across production. ↩
-
Teaches quick inspection cues to prevent puckering, seam failure, and sloppy finishing. ↩
-
Clarifies the approval criteria and common pitfalls so you don’t approve a flawed standard. ↩
-
Outlines what “approval” should legally/operationally include so you have leverage if issues arise. ↩
-
Shows how brands use a golden sample as the reference point to enforce consistency with factories. ↩ ↩
-
Explains how interior finishing impacts comfort and perceived quality—key for premium branding. ↩
-
Provides a comprehensive checklist framework so you systematically reduce errors and rework. ↩
-
Helps you confirm every component (fabric, trim, thread) so substitutions don’t slip into production. ↩ ↩ ↩
-
Shows acceptable variance standards and measuring methods to reduce returns due to fit issues. ↩
-
Gives practical tests to ensure closures feel smooth, durable, and consistent across units. ↩
-
Offers a structured pre-flight process that catches label, material, and construction errors early. ↩
-
Improves factory understanding with visual callouts so specs aren’t misread or guessed. ↩
-
Explains how vector art prevents jagged edges and digitizing problems for cleaner embroidery. ↩
-
Shows the essential pages and spec depth so your factory can’t “fill in the blanks” incorrectly. ↩ ↩
-
Helps you choose shipping terms that prevent surprise fees and clarify who pays for what. ↩